
Getting started with Nodejs and Arduino UNO Tutorial
NodeBots Day is just a couple of weeks away, so I want to share what I’ve been doing with Node and Arduino in recent times.
I had no idea what Arduino even was until recently, I didn’t really understand it, or how to get started with it.
Note: this is an adapted version of the guide at http://node-ardx.org/ – thanks to SparkFun and .:oomlout:.
I’m still quite a newbie at this, so do let me know if you see anything that I can improve on or do differently.
Getting started with Arduino UNO
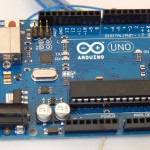
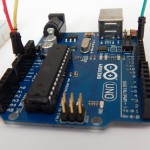
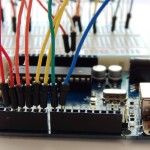
The first thing you notice about the UNO is that it’s really small.
It’s pretty much like a small version of the board that you’ve no doubt seen if you’ve ever taken a desktop or laptop computer apart.
Without going into the nitty gritty, the thing to note is that this UNO board can be plugged and controlled by a USB port on your computer.
You can literally cut a few lines of JavaScript, and make the UNO board do as you command (within reason), just with a USB cable!
To get started with these examples, you need to collect the following:
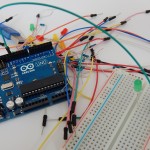
Hardware:
- 1 x Arduino UNO
- 1 x USB cable to plug into the UNO
- 8 x 5mm LED (the lights)
- 8 x 330 ohm resistor (orange-orange-brown)
- 10 x jumper wires
- 1 x Solderless Breadboard
Bits and Bobs – (you wont need all of this)
Software:
- Arduino IDE – get the non BETA version – today that’s 1.0.5.
- Node.js
- johnny-five – get this from Github (check out my guide if you’re not sure how)
Set up the foundations – by loading Firmata onto your Arduino UNO
- Download Arduino IDE
- Connect your Arduino UNO via USB to your computer
- Launch Arduino IDE and open the Firmata sketch via the menu: File > Examples > Firmata > StandardFirmata
- Select your Arduino board type (e.g. Arduino UNO) via Tools > Board
- Select the port for your board via Tools > Serial Port > (the comm port of your Arduino)
- Upload the program by selecting File > Upload
At this point, you’ll notice some activity on the UNO. You can also have a look at some examples just to test the UNO out.
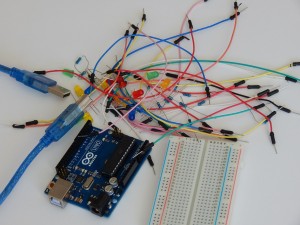
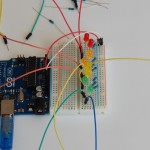
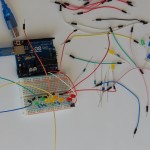
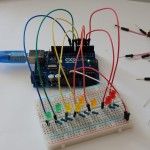
Test out the UNO using Arduino IDE
-
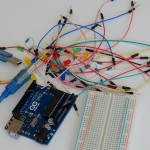
- Bits and Bobs – (you wont need all of this)
-
- Arduino UNO
-
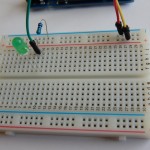
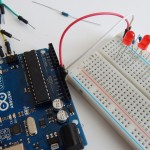
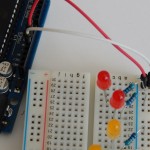
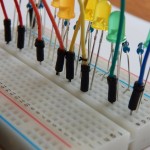
- Green on Port 13, Yellow on 5V, Red on Ground
-
- Different Angle
-
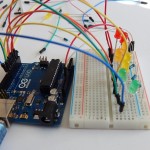
- Breadboard
-
- Done!
- Set up the UNO with a single Led – see gallery above
- Open an example sketch via the menu: File > Examples > 01.Basics > Blink
- Select the Verify button
- Upload the program by selecting File > Upload
That’s it for Arduino IDE ! Now we move onto the Node side of things.
Set up Node and Johnny-five
- Download and Install Node if you don’t have it already.
- Open up a command line tool, I’m using Windows, so me that’s Windows Powershell
- Navigate to an appropriate directory location:
cd C:\Users\Jane\Projects - Clone the johnny-five project from GitHub:
git clone git://github.com/rwldrn/johnny-five.git - Install johnny-five:
npm install johnny-five - Navigate into the examples folder:
cd C:\Users\Jane\Projects\johnny-five/eg
Example 1: Set up a single led
- Start the program on pin 13:
node led (or node led.js) - Pat yourself on the back if your led blinks!
- Check out some of the options available for led:
led. 'tab key'will show you options – but look at the johnny-five docs for more details. - Stop the led
led.off() - Start the led
led.on()
Check out the strope settings:
- First, we need to change from port 13 to a PWM port:
led.stop() or just Ctrl+C twicepull out the USB and change the wire from 13 to 3. - Start Node on port 3:
node led 3 - Tell the program to strobe/blink at 300 milliseconds:
led.strobe(300)
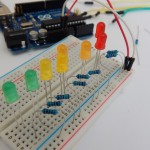
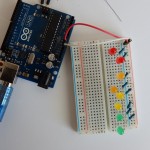
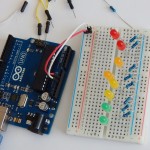
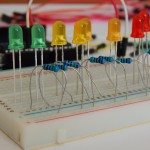
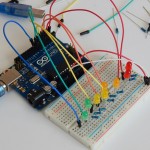
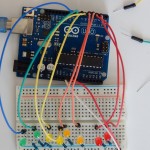
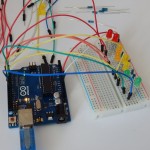
Example 2: Set up 8 leds
- 2 pin header x 4
- 5mm LED x 8
- 330 ohm resistor (orange-orange-brown) x 8
- jumper wires
Follow the pictures below, or check out this site for the circuit layout
Lets get into it:
- Create a new .js file called “code-leds.js”.
- In code-led.js enter the following details
var j5 = require("johnny-five"); var board, leds=[], ledPins = [2,3,4,5,6,7,8,9]; board = new j5.Board(); board.on("ready", function() { // initialize LEDs using a for loop for (var i = 0; i < ledPins.length; i++){ var myLed = new j5.Led(ledPins[i]); leds.push(myLed); } function allOn(){ for (var i = 0; i < leds.length; i++) { leds[i].on(); } } function allOff(){ for (var i = 0; i < leds.length; i++) { leds[i].off(); } } function oneAfterAnother() { var delay = 1; board.counter = 0; for (var i = 0; i < leds.length; i++) { var led = leds[i]; board.wait(delay,function(){ console.log(this.counter + " on"); leds[this.counter].on(); }); board.wait(delay + 200,function(){ console.log(this.counter + " off"); leds[this.counter].off(); this.counter = (this.counter + 1) % leds.length; }); delay += 500; } } // allOn(); // board.wait(1000,allOff); oneAfterAnother(); board.loop(4500, oneAfterAnother); }); - Scenario 1 – turn on one led after another:
node code-leds.js - Scenario 2 – flash all of the leds on and off:
swap the commented lines – from this// allOn(); // board.wait(1000,allOff); oneAfterAnother(); board.loop(4500, oneAfterAnother);To this – you can change 1000 to 3000 milliseconds to change the wait time
   allOn();
   board.wait(1000,allOff);
  //oneAfterAnother();
  //board.loop(4500, oneAfterAnother);
run:
node code-leds.js
I’m really excited to be mentoring at NodeBots Day this year, (on the 26th of July in Melbourne!). Hopefully we’ll start to see some more women entering this very cool area of tech!